One Arm Handstand

Foundation movement push
advanced Level 5 / 7
Athlete performing the One Arm Handstand calisthenics exercise static

The clean one arm handstand is a refinement of the one arm handstand rather than a skill you should learn from scratch. First develop a strong freestanding handstand and learn to transfer your weight onto one arm using a straddle position. From there, gradually reduce assistance from the free hand until you can balance consistently on one arm. Only then should you start bringing your legs together while maintaining the supporting shoulder stacked over the hand and actively pushing through the floor.

Difficulty advanced
Progression level 5 / 7
Movement static
Category push
Muscles worked
P
PrimaryMain muscles
Front Deltoids Triceps Serratus Anterior
S
SecondarySupporting muscles
Forearms Abdominals Obliques Upper Back
Equipment
Equipment Floor
1

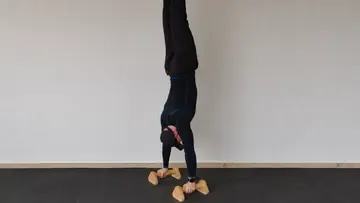
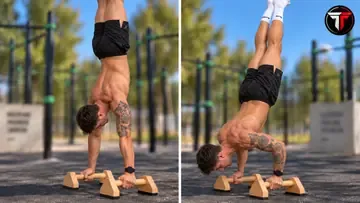
Master your freestanding handstand

Build a consistent two-arm handstand before beginning serious one-arm work. Practice controlling small balance changes through your hands and fingers while keeping your elbows straight and shoulders actively elevated.
2

Learn the one-arm weight shift

From a straddle handstand, gradually shift your hips and center of mass over one hand. Keep the supporting arm straight and push strongly through that shoulder instead of simply leaning the shoulder far out to the side.

3

Reduce fingertip assistance

Once your weight is over the supporting hand, rise onto the fingertips of your free hand. Gradually reduce their pressure and use fewer fingers until the second hand is providing almost no meaningful support.

4

Balance the straddle one arm handstand

Remove the assisting hand only after your weight has fully transferred onto the supporting side. Learn to balance consistently with your legs apart before trying to close them. Use your supporting fingers, hips, and legs for small corrections.

5

Close into the clean position

From a controlled one arm handstand, gradually bring your legs together above you without losing the supporting shoulder position. Finish with straight knees, pointed feet, and a controlled vertical line while continuing to push tall through the supporting arm.

Lifting the free hand too early

Do not simply pick your hand up and hope to catch the balance. First transfer your center of mass onto the supporting hand until the other hand becomes almost weightless. Fingertip-assisted holds are much more useful than repeatedly throwing yourself into uncontrolled attempts.

Moving the shoulder too far sideways

The goal is to bring your body over the supporting arm, not throw the supporting shoulder far outside the hand. Keep pushing tall through the shoulder and learn to shift your hips and body around a stable supporting arm.

Collapsing through the supporting shoulder

Keep the supporting elbow straight and maintain active shoulder elevation. Sinking into the shoulder reduces your ability to control the position and makes the already narrow balance window even harder to manage.

Closing the legs before owning the straddle

Legs together remove many of the larger balance corrections available in a straddle one arm handstand. Build consistent one-arm balance with your legs apart first, then gradually reduce the straddle instead of forcing the clean position immediately.

You are here
Current exercise One Arm Handstand advanced · Level 5
01

What makes a one arm handstand clean?

For this progression, clean means performing the one arm handstand with straight legs held together in a controlled vertical position rather than using a wide straddle. It is a stricter refinement of the standard straddle one arm handstand.

02

Should I learn a straddle one arm handstand first?

Yes. A straddle gives you more freedom to position your legs and hips while learning one-arm balance. Once you can consistently transfer your weight and balance on one hand, you can gradually narrow the straddle and work towards the legs-together position.

03

Is the one arm handstand mainly a strength skill?

Strength is necessary, especially in the supporting shoulder, arm, wrist, and hand, but balance and technique are major limiting factors. You need to transfer your center of mass precisely over one hand and make constant small corrections without losing your shoulder position.

04

How do I balance on one hand?

Your supporting hand and fingers make small corrections to control forward and backward balance, while your shoulder, torso, hips, and legs help manage the much harder side-to-side balance. The goal is not to stay completely motionless, but to make increasingly small and controlled corrections.